en:dienste:vpn
4.07 VPN
Windows
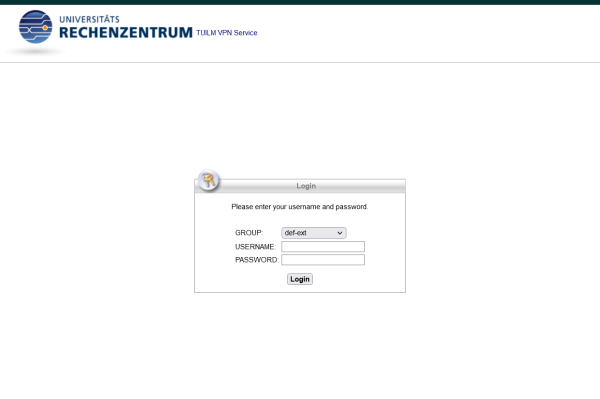
https://vpn2x.tu-ilmenau.de/ call up and log in with the university account
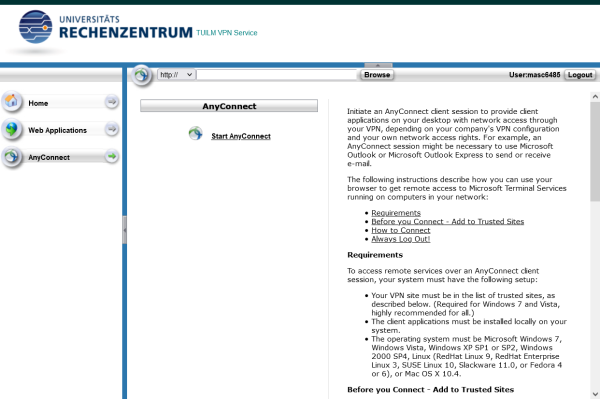
Click on “AnyConnect” on the left and then on “Start AnyConnect”.
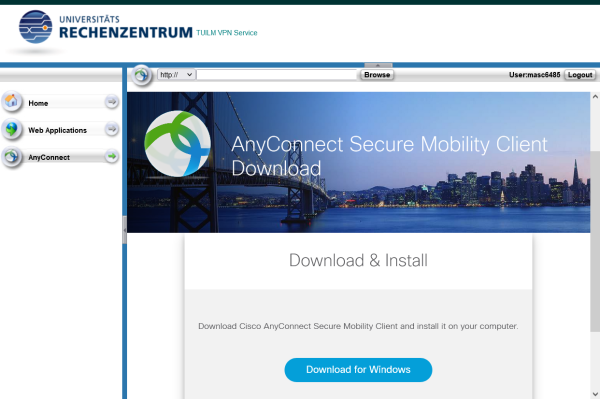
“Click on “Download for Windows
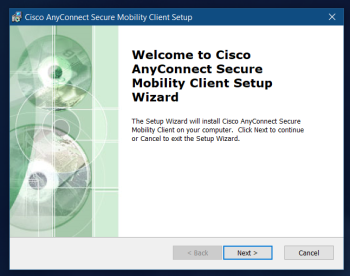
Run the downloaded installation wizard
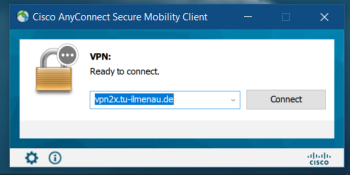
Open the “Cisco AnyConnect Secure Mobility Client” program that has now been installed, https://vpn2x.tu-ilmenau.de enter the server address and click on “Connect”.
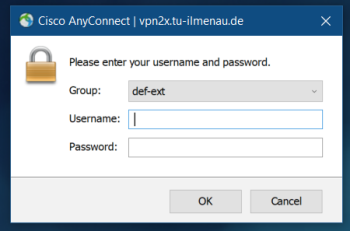
Select “def-ext” or “def-ext-full” and log in with your university account.
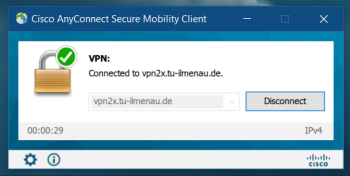
In the system section of the control bar, the Cisco AnyConnect icon can be clicked and the connection can be disconnected by clicking on “Disconnect”.
Linux (KDE)
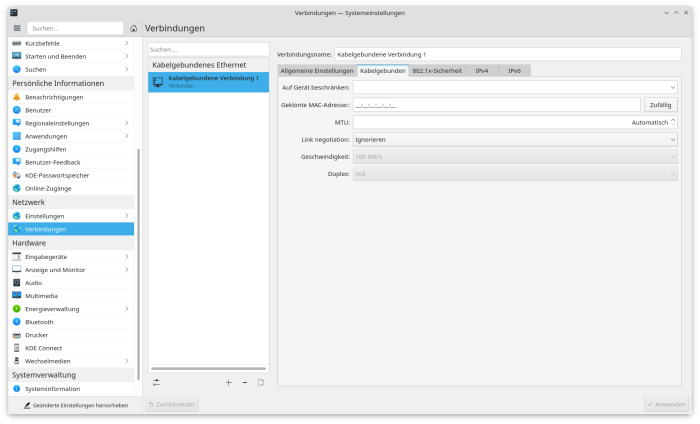
In the system settings under “Network” / “Connections”, click on the ”+” under the list of all connections.
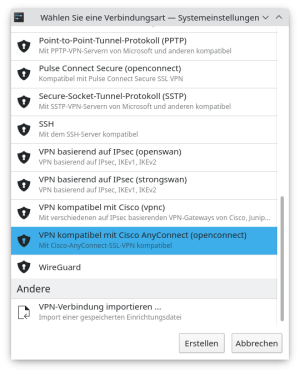
Select “Cisco AnyConnect (openconnect)”.
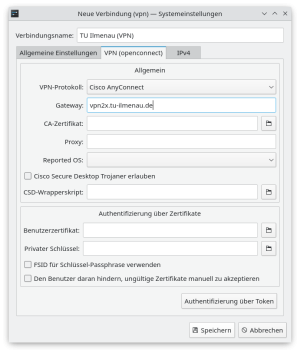
Enter connection name and gateway (vpn2x.tu-ilmenau.de)
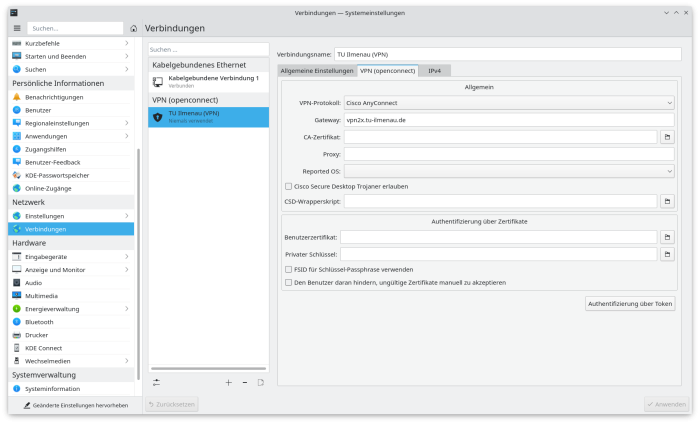
Now the VPN connection appears in the list of all connections
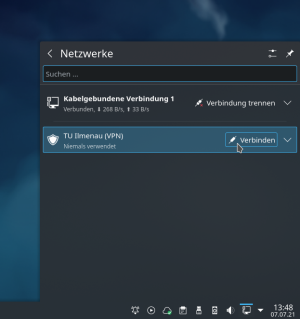
Open the “Networks” tab and click on “Connect” next to the VPN connection.
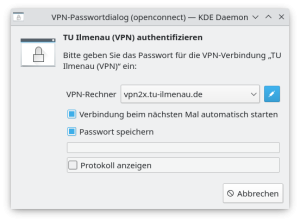
Click on the connection icon next to the VPN gateway address.
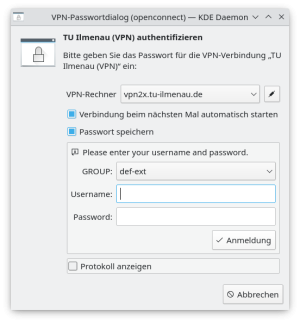
Select “def-ext” or “def-ext-full” and log in with the access data of the university account.
Linux (Gnome)
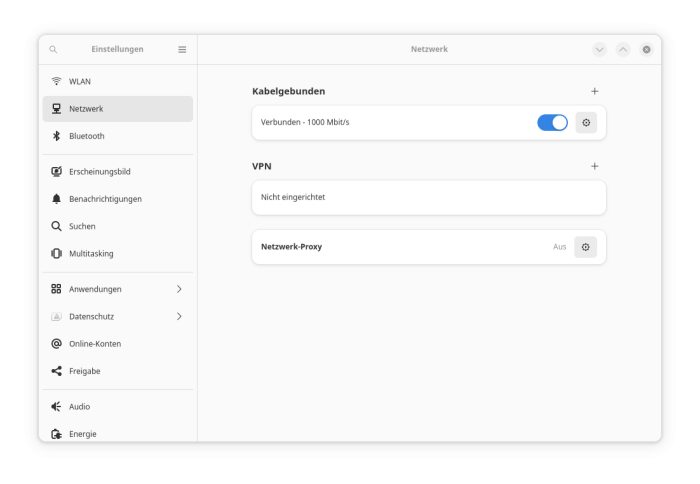
In the system settings under “Network” click on the “+” in the “VPN” section
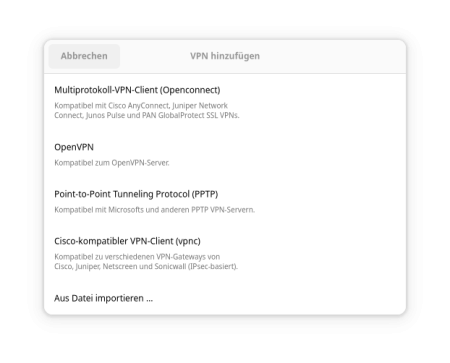
“Select “Multiprotocol VPN Client (Openconnect)
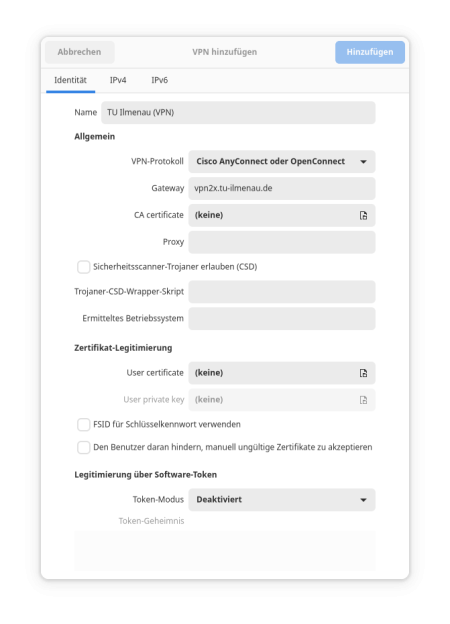
Enter connection name and gateway (vpn2x.tu-ilmenau.de)
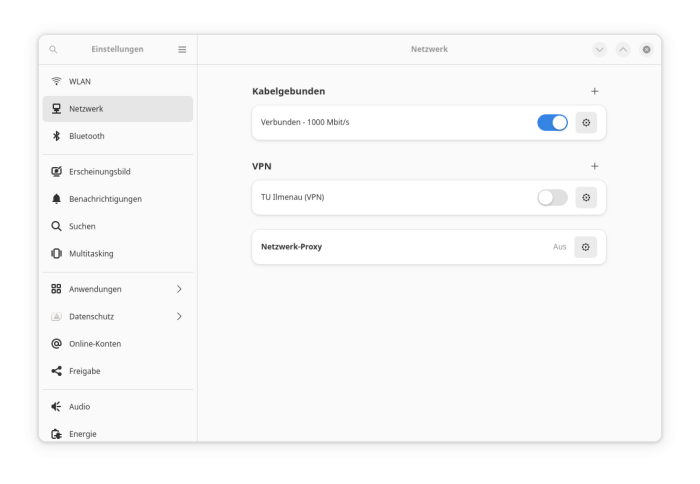
Now the VPN connection appears in the list
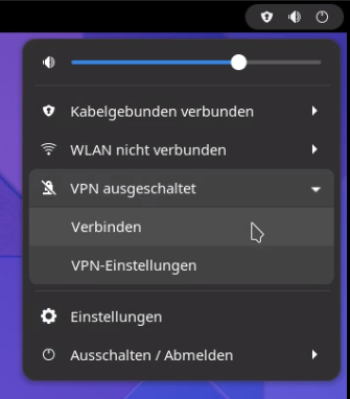
Click on the top right, open the section “VPN switched off” and click on “Connect”.
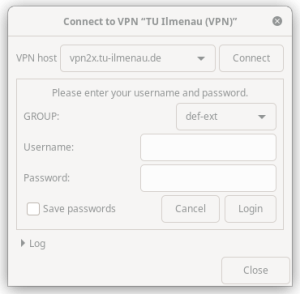
Select “def-ext” or “def-ext-full” and log in with the access data of the university account.
MacOS

https://vpn2x.tu-ilmenau.de/ call up and log in with the university account

Click on “AnyConnect” on the left and then on “Start AnyConnect”.

“Click on “Download for macOS
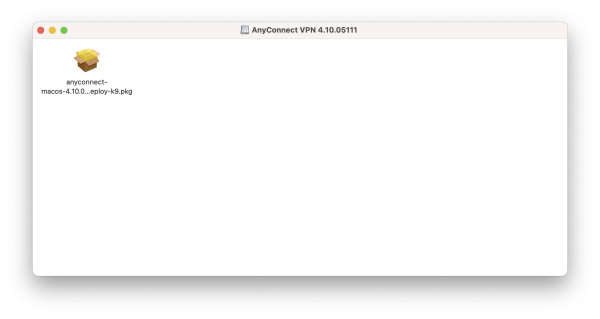
Open the downloaded DMG file and click on the PKG file there.
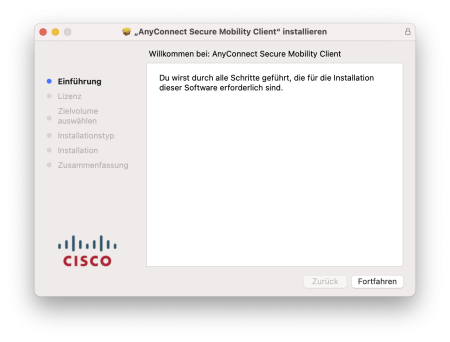
Follow the instructions in the installation programme (accept licence conditions).
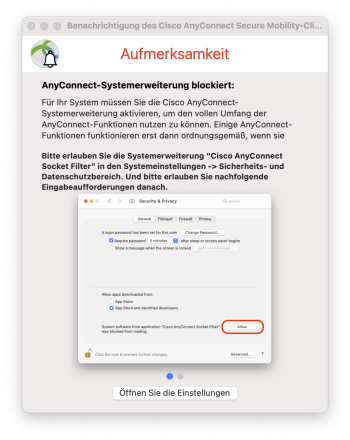
This window should appear during the installation. Click there on “Open the settings”.
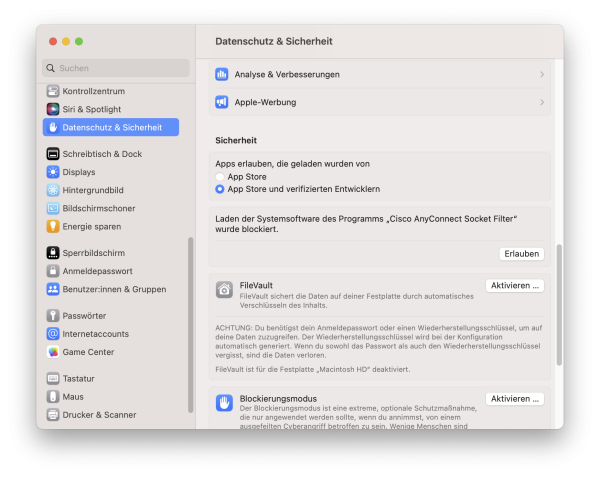
In the system settings under “Privacy and Security” in the field “Loading of the system software of the programme “Cisco AnyConnect Socket Filter” was blocked click on “Allow”.
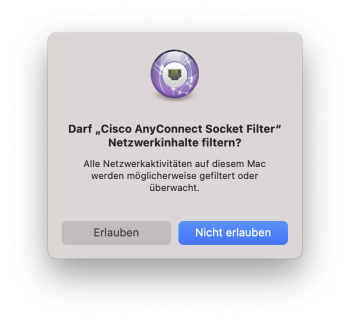
Then confirm in the window that appears
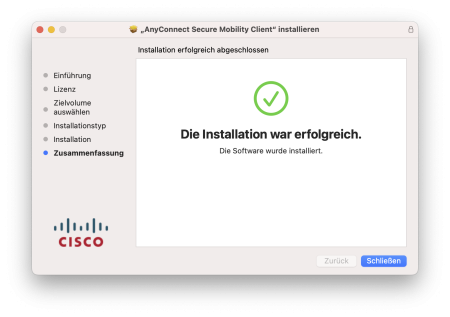
Exit the installation programme
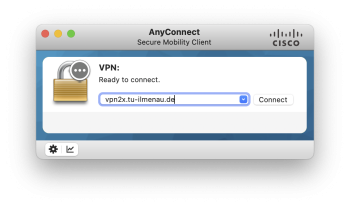
Open the “Cisco AnyConnect Secure Mobility Client” program that has now been installed, https://vpn2x.tu-ilmenau.de enter the server address and click on “Connect”.
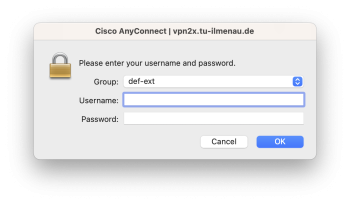
Select “def-ext” or “def-ext-full” and log in with your university account.

The connection is now established
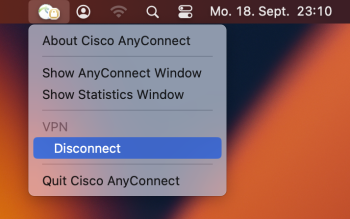
In the system section of the control bar, the Cisco AnyConnect icon can be clicked and the connection can be disconnected by clicking on “Disconnect”.
Android

The Cisco AnyConnect app (https://play.google.com/store/apps/details?id<ignore>=com.cisco.anyconnect.vpn.android.avf</ignore>) install
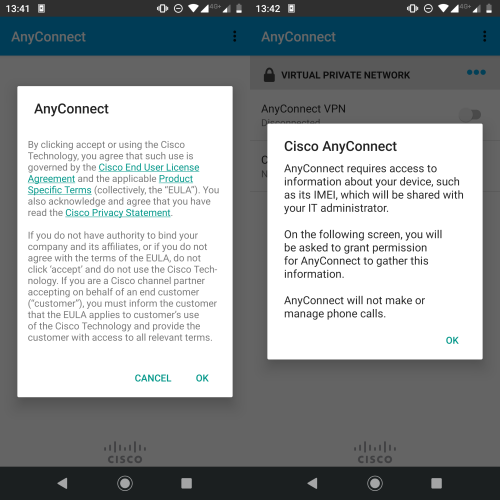
Accept conditions and permissions
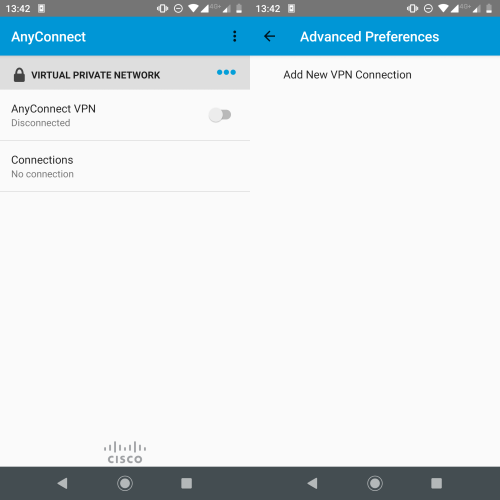
Click on “Connections” and then on “Add New VPN Connection”.
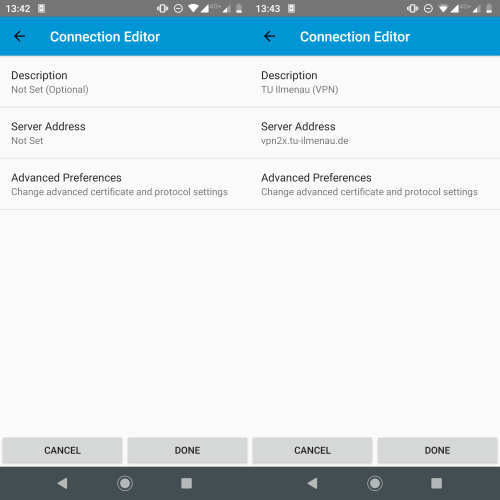
Enter a title for the connection by clicking on “Description” and the VPN server address vpn2x.tu-ilmenau.de under “Server Address”.
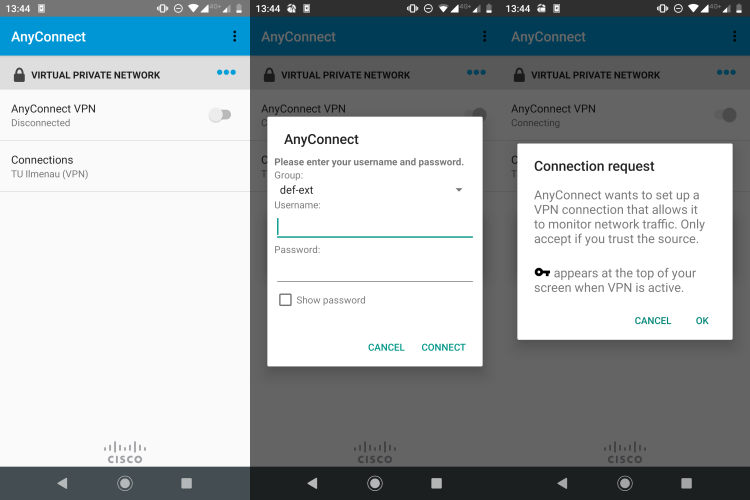
Click on the button to establish the connection, select “def-ext” or “def-ext-full” and log in with the access data of the university account.
iOS
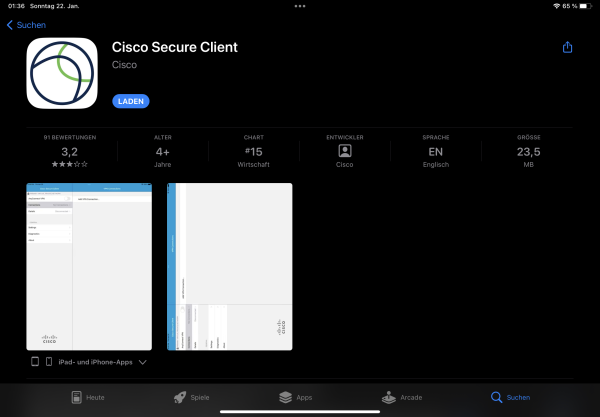
The Cisco Secure Client app (https://apps.apple.com/de/app/cisco-secure-client/id1135064690) install
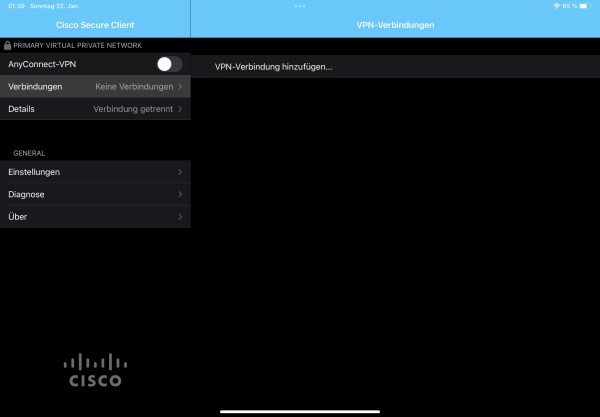
Click on “Connections” and then on “Add VPN connection …”.
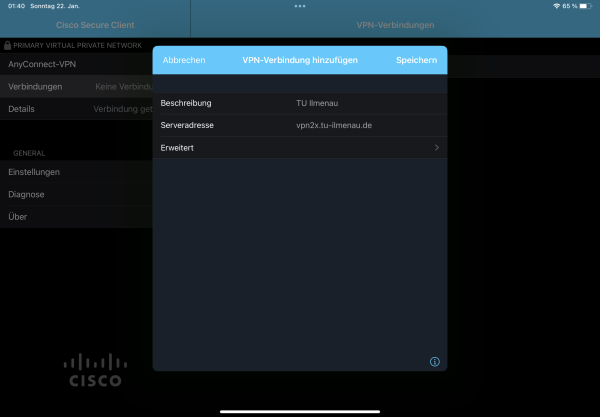
Enter a title for the connection under “Description” and the VPN server address vpn2x.tu-ilmenau.de under “Server address”. Then click on “Save”.
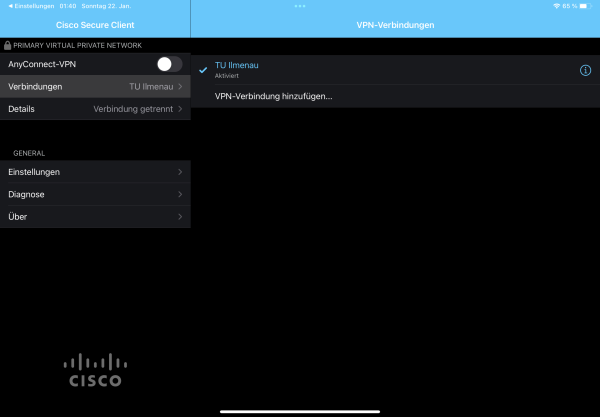
Click on the “AnyConnect-VPN” button to establish the connection.
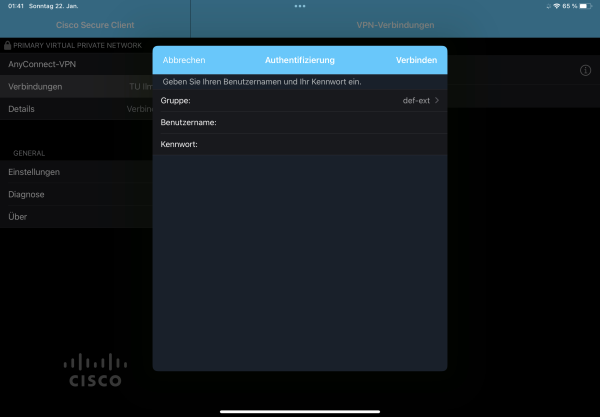
Select “def-ext” or “def-ext-full”, enter the access data of the university account and click on “Connect”.
en/dienste/vpn.txt · Last modified: 12.10.2023 20:45 by 127.0.0.1
